

By Robert Verkerk
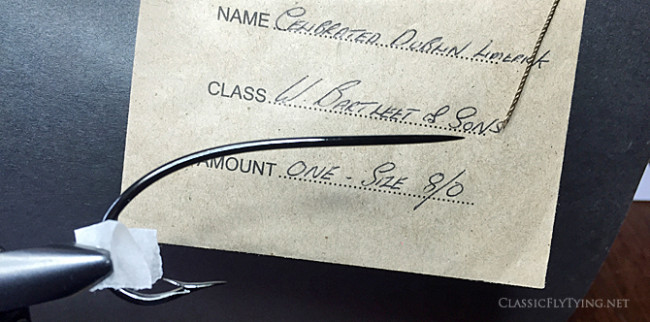
One of my favorite patterns, with some of my favorite feathers. My earlier research, and one of my conversations with a good friend, Michael Johnson, revealed that the original Ghost Flies were tied on Bartleet Limerick hooks, size 8/0. John Saxton was kind enough to donate me the hooks I need. Very well cared for, and matching the hook plate to a tee. It was a bit exciting to put in my Regal vice, and I was relieved when the finish didn’t snap off under the pressure. Well done, John!
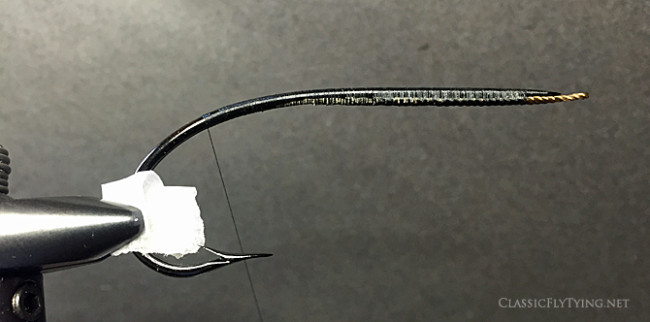
Step 1: Tying on the gut.
I had a piece of vintage gut saved up for this project. Fully gutted is the only option for me, as I want to tie flies that could actually be fished. Chewing up the ends to create a taper, allowing saliva to soften the strands… I usually start the gut a bit further away from the head than others do.
I tie the gut with thread wraps that aren’t too close together, so the gut can dry and harden. If you actually intend to fish your gutted fly, you should allow the gut to dry thoroughly, to prevent ‘drawing’ when fishing.
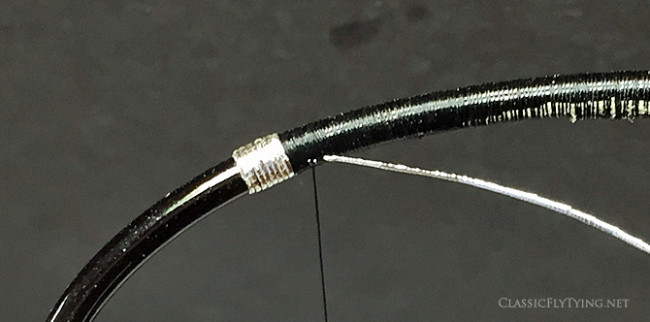
Step 2: Tying in the tinsel for the tag.
I flatten the bit that goes under the thread with flat beak pliers, and then I tie the tinsel in on the far side of the hook, so that you don’t see the tie in point from the near side.
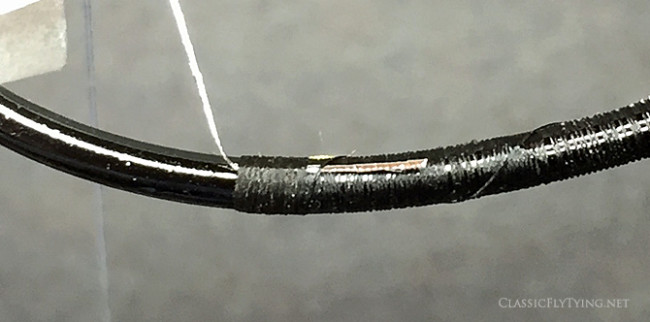
The original Ghost Fly has 9 turns of tinsel in the tip… I tie off on the near side, exactly opposite to the starting point. Avoids bulk, and it looks cool. I flatten the waste end with my thumb nail.
The most important bit, is that the tip is tight, and neat.
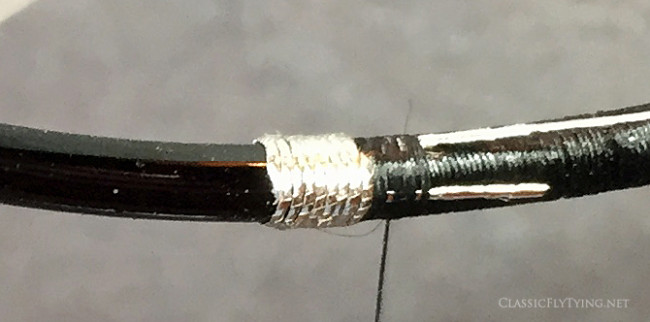
Step 3: A tag with Quetzal herl.
This once, I have decided to tie the fly with original materials. Every time I take my delicate stash of Quetzal feathers out of the box, I marvel at their ridiculously expensive beauty. Will I dare to cut them this time? Fortunately, the tag of this fly doesn’t require a lot of material. One XL feather is enough, or two large ones.
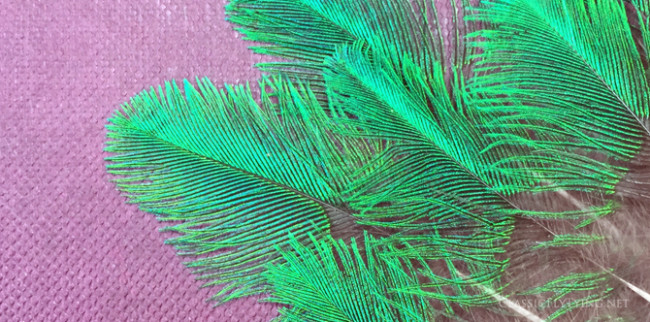
I cut five fibers at the base of the stem, and use the brown parts to trap them under the well waxed thread. After that, I grab the green sides, all of them together, and rotate them around the thread with my thumb and index finger. As if it were dubbing.
You’ll get one or two turns out of these fibers. Then cut five more, and repeat, until the tag is just a tad longer than the tip. Part of the tag will be hidden by the fibers of the butt, so the extra length will give the illusion that the tip and tag are the same length. The tag could be longer, but never appear shorter than the tip. That just wouldn’t be sexy.
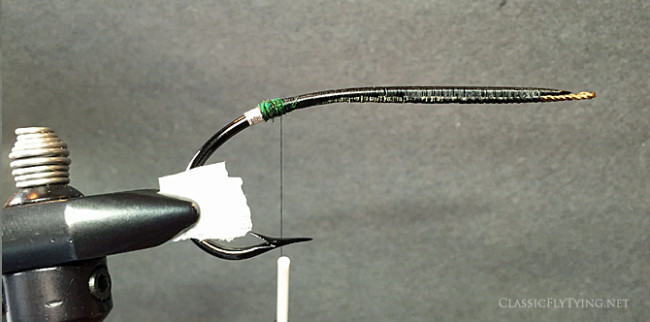
Step 4: The tail.
A breast feather from the Western Tragopan is a lively cinnamon scarlet when fresh. Exposed to UV radiation, this colour rapidly fades to a dry and pale yellow.
It didn’t feel right to use a bleached and faded breast feather while I am tying the rest of this fly with fresh materials. So I have chosen to used a red one, just like the tail on the original Ghost Fly used to be, all those decades ago…
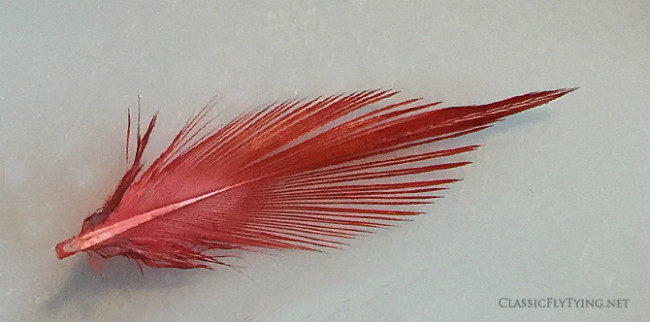
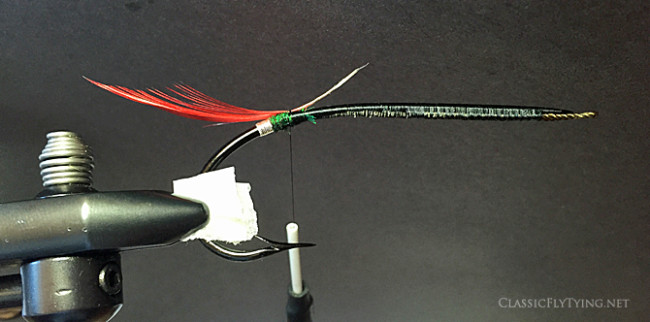
Flattened with flat beak pliers from the tie in point down, and trimmed a bit with scissors, to get rid of one of the most annoying stems I have ever worked with. Waxed the thread, and got it on straight, at the first try. Watch the length, the original tail isn’t much longer than the gape.
Two thread wraps.
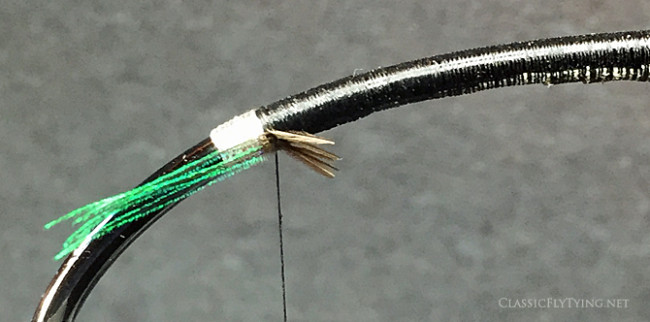
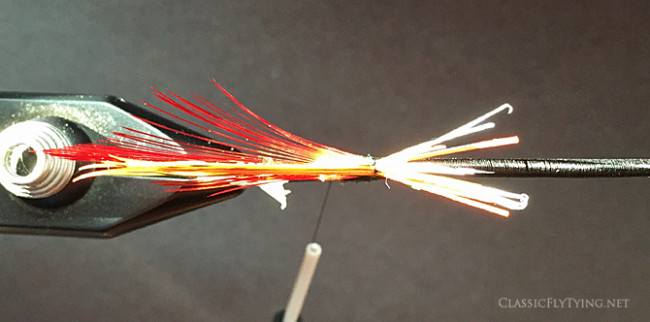
Step 5: Veiling the tail.
Charles Chute’s careful analysis says “tied as a clump”. So lets gather all the materials, and look at the photograph to estimate the amount of fibers of each material. Maybe a bit extra Wood Duck, as it is so beautiful.
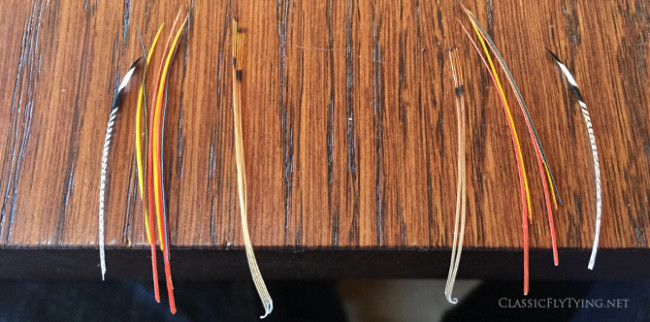
Then use the bodkin to slide the fibers and slips together.
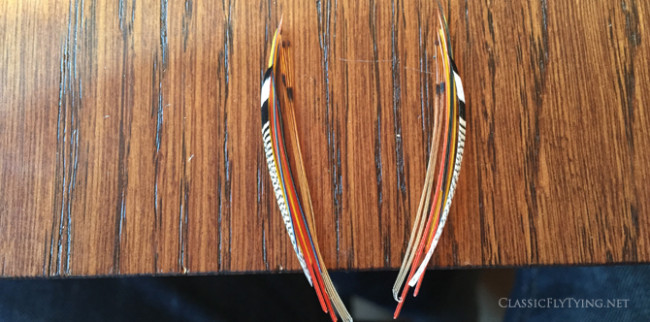
Before anything, I first lift the waste end of the tail, straight up.
Then I pick up the fibers for the far side and stack them against the upright waste end of the tail, hold tight between thumb and index finger and compress a bit with the index finger of my other hand. Then I give them one tight thread wrap.
I do the same thing with the fibers for the other side, and fasten with another thread wrap. So the entire tail is now secured with four thread wraps.

Straight enough… The waste end fibers will be used to fill the gap in the taper that was left by the gut ending short of the bend. Secure, and nice.
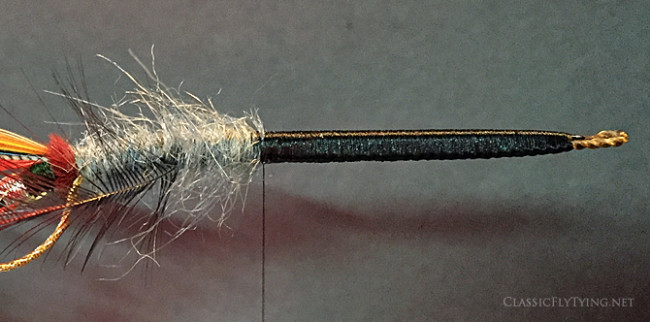
Step 6: The butt.
We all know how to tie in an Ostrich herl and tie a butt. Three wraps of herl on a flat foundation of waxed thread. The length of the barbules on the herl are the most important, as well as tying it straight, side by side. Again, I tie off with a single thread wrap.
Step 7: The tinsels and the waste ends.
Four large tinsels for this one. I flatten the parts that will go under the body, with flat beak pliers. I use a good length of them, so that I can be sure that no fish or cast force will rip them from under the coils of thread. Some people are afraid of bulk, so they compromise the quality of their fly.
I start with the first tinsel, high up on the far side, so that a decent portion of the blue fur will be visible between the butt and the first wrap of tinsels. A style feature that Dave Carne taught me.
I make the waste ends meet the gut, and then secure it with a few spacious thread wraps, so that I can use my bodkin to move stuff around and flatten it with my fingernails.
Carefully looking where the body work needs an extra layer to even things out, I slowly cover everything with tying thread, preparing for the dubbing.
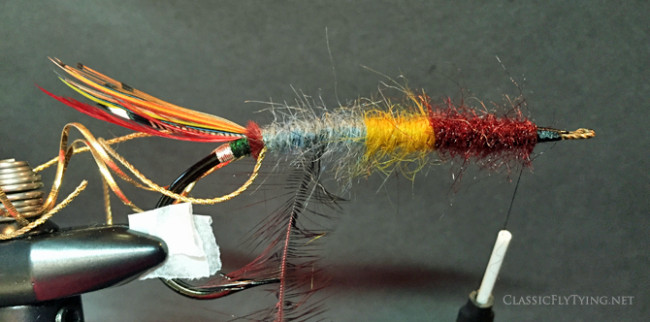
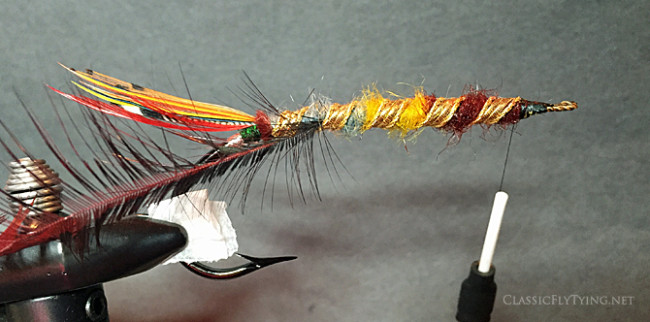
Step 8: Dubbing the body.
I find it very important to start the dubbing really thin and tight, so that the fur doesn’t get higher than the thickness of the rachis of the Ostrich herl. To pull this off, you need a real tacky wax, so that the dubbing really sticks to the thread. After two or three turns, I’ll slowly allow the thread to get more ‘furry’.
Don’t forget to tie in the (palmered) hackle at the second turn of tinsel.
The body should be blue for the first half, and the second half golden yellow and fiery brown in equal sections. We know that the throat hackles will hide a chunk of the front section, so in order to give the visual appearance of the blue being half, and the remaining sections a quart each, I make the front section a bit longer.
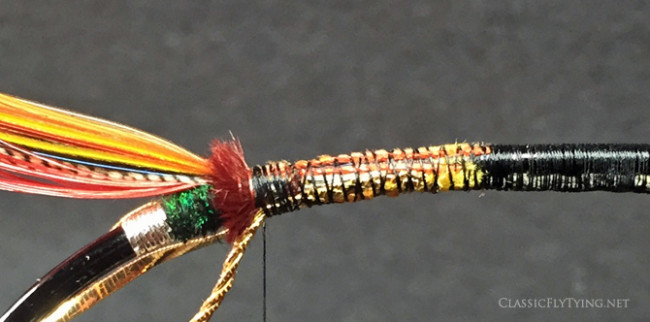
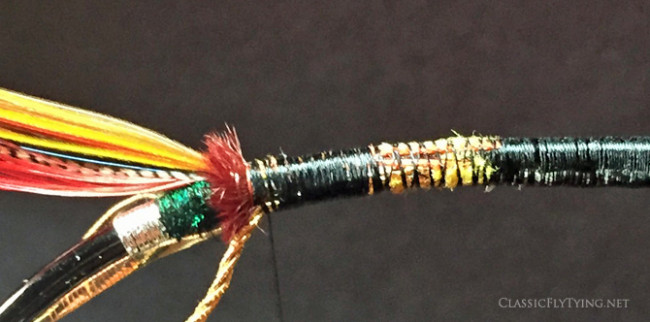
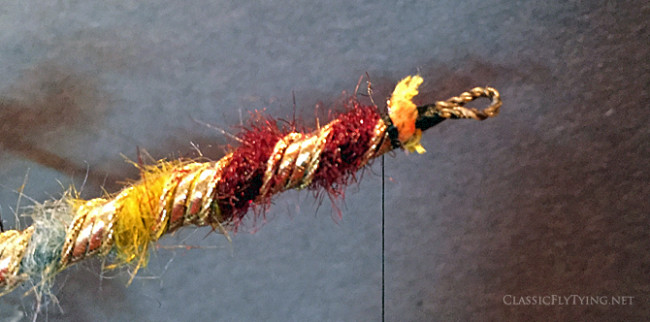
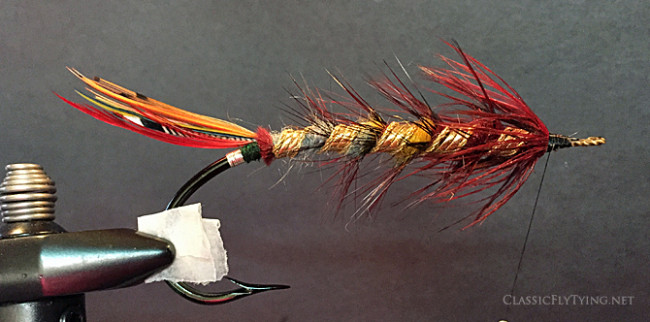
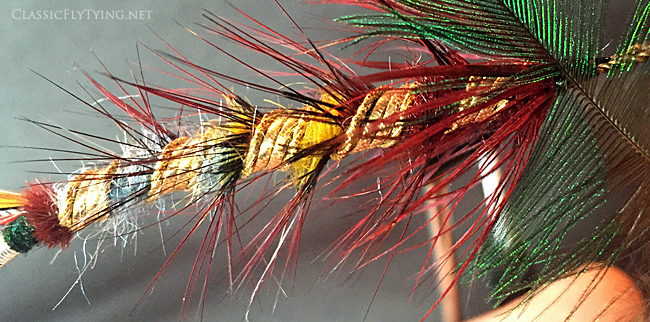
Step 9: Ribbing and hackle.
Lots of tinsels. Tight dubbing has the advantage that the tinsels don’t cut too deep into the body. Tight dubbing also prevents air from getting trapped between the fibers, a phenomenon that would seriously mess with the balance of the fly, which dragging it trough a pool.
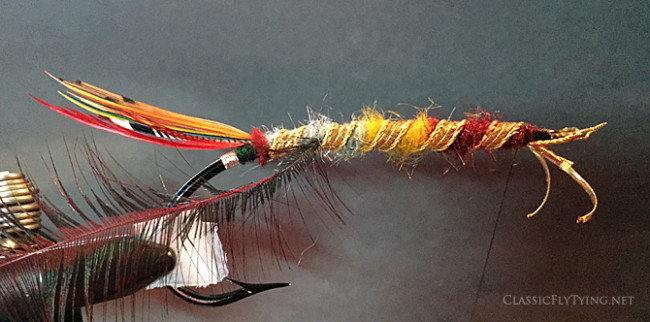
Each strand of tinsel is tied off with one waxed thread wrap, then flattened with my thumb nail, before the next tinsel is wounded. In the end, it is a big clump of metal, and it needs to be managed well. I make sure that each strand is sitting tightly next to its friends, and when the final tinsel is in place, I add another two waxed thread wraps.
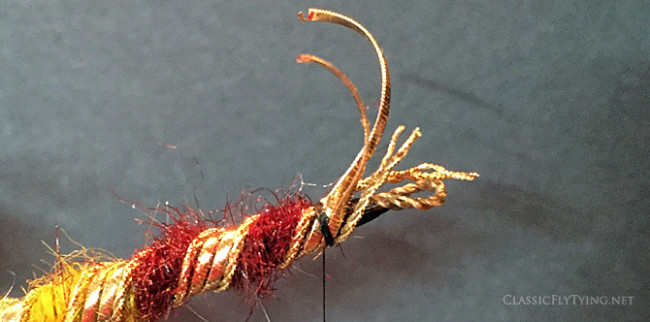
To reduce bulk and keep an even platform for the head underneath the shank, I use pincers to drag the metal of the silk cores. I first untwist the lace twist and do the same thing with each and every wire.
Be very careful not to uncoil the metal underneath or even beyond the tie in point. This would seriously compromise the quality of the fly, to the point where the tinsel could come undone when you’re fishing it.
When all the silk is exposed, it is time to start trimming the waste ends. Cut close to the tie in point, all the time with the shape of the head in mind. Cut a straight line, and if possible, taper it forward.
When satisfied, wax your thread, and tie off the waste ends with about 5 wraps.
When all looks good, wrap the hackle while making sure the rachis points the correct way, so that it will be easy to force the fibers backward. At the head, make just one coil, because we will add two turns of Quetzal and three turns of red claret hackle.
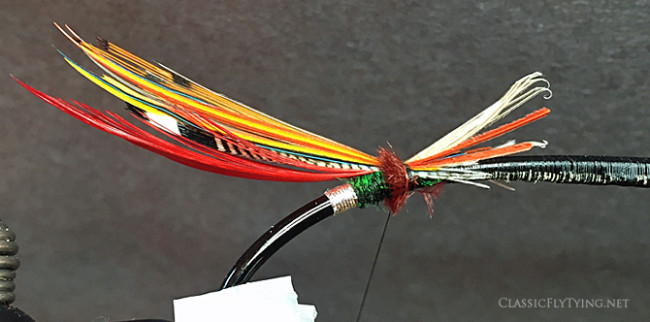
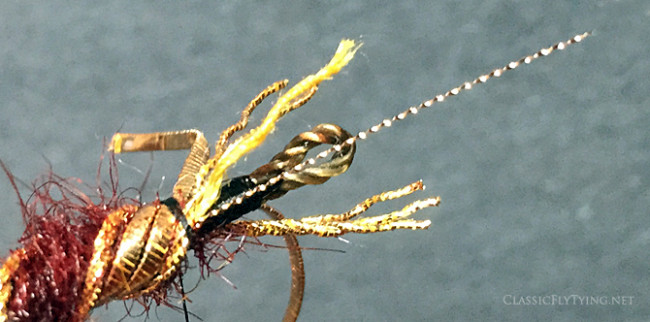
Step 10: Troat and wing platform.
When I try the different Quetzal hackles I have, it becomes clear why the throat on the original Ghost Fly isn’t longer. I am lucky that I didn’t choose a longer Cock’s hackle, because even the largest Quetzal hackles comes up short, even if it is just a millimeter or two.
Two turns. You don’t get more than that out of these hackles regardless.
The above gives such a clear example of what this website has to offer. Besides step by step tutorials, there are clear instructional on individual techniques and specific parts of a fly. There are pattern descriptions, original Fishing Gazette articles, in depth looks at materials and their origin, and new content is added regularly.
If you liked what you have seen so far, and would like to continue with part two, then click on the following link.