

This step-by-step tutorial uses photography and text by Ryan Houston. The article has been edited by Robert Verkerk for clarity, approved by the author for it’s content and correctness, and is published here with permission.
In this tutorial the process of using the natural “water-resisting” qualities of waterfowl feathers will be explored for dying two-tone feathers with two dye-bath preparations. While the method described here is being used to create substitute feathers to match the natural coloration of a Toucan breast feather, the process is applicable to the mimicking of other species.
To use the natural “water resistance and flotation” qualities of waterfowl feathers, this process relies on dying a ”patch of feathers” that have not been removed from the skin and are completely dry. The Toucan’s yellow breast feathers, are actually two-tone in colour. At the base of the feather it has a whitish or pale yellow colour and then blends into the full vibrancy of the natural colour at the upper half. There are many subspecies of Toucan within the scientific family order. The two subspecies most commonly used in classic salmon fly dressings are the Ariel Toucan, Ramphastos vitellinus ariel (golden yellow) and the Keel-Billed Toucan, Ramphastos sulfuratus sulfuratus (lemon yellow).
In sharing this information with the salmon fly tying community it is our hope that this technique will provide inspiration for further experimentation in the development of substitute feathers. By choice, the nature of this article is less scientific. No exact measurements were made, thus none will be included within the body of the tutorial.
Three key elements to using this technique.
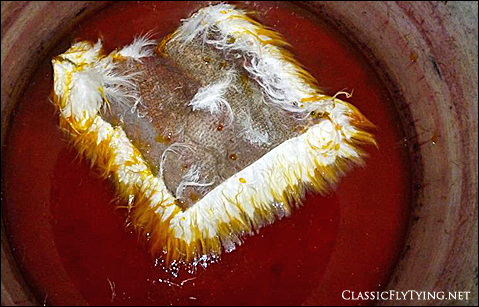
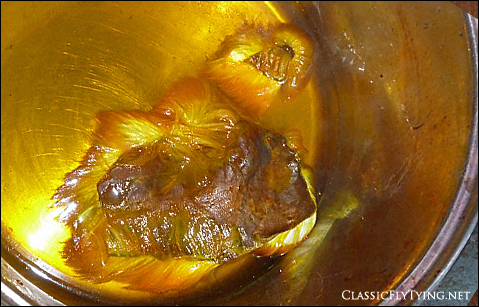
The waterfowl feather patch must be dry when placed in the first dye bath. In photograph number 2 you can see that the feather patch is floating and the natural water resistance prevents the dye from protruding deeply at this point, just like when the bird sits in the water of a pond.
Timing in the first dye bath is very important. The dye stock should be strong to keep the feathers from sitting in the stock for hours and sometimes days. A weak dye bath will require more time in the dye stock to obtain the desired colour, thus the longer the feather patch sits in the dye bath the more chance of the dye soaking up into the patch.
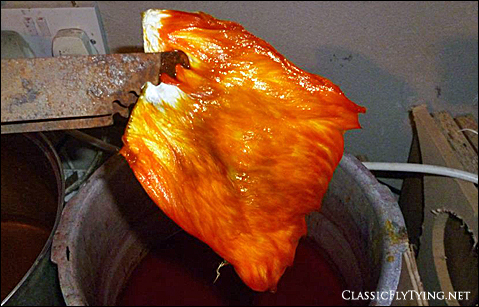
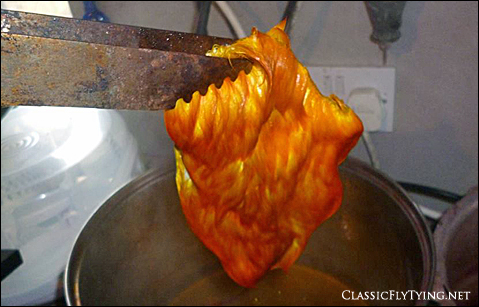
In photograph number 5 (the second dye bath) it is important that the feathers are allowed to soak deeper into this dye bath. This step will colour the mid to base part of the feather, giving the feathers the two-colour effect.
The Actual Process
Ryan Houston demonstrates the technique by using the neck of a fresh skinned Goose.
Step 1
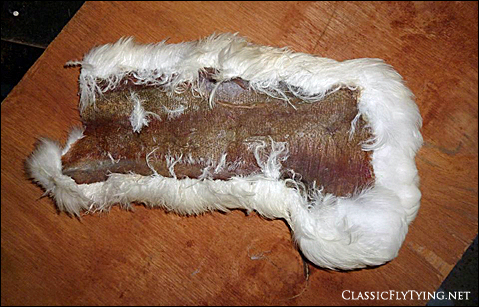
For this to work, the feather patch must be completely dry. In these photo’s you can see that the feathers and the skin are both dried and thus are ready to be processed.
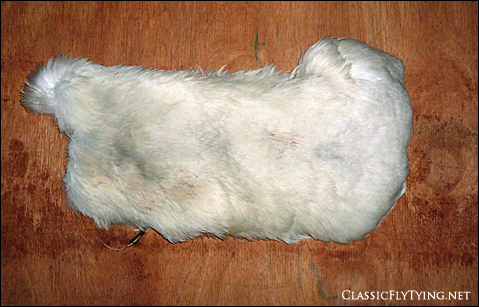
Ryan dries skin patches on wood. The skin sticks to it and dries perfectly flat. You can simply peel it off after a couple of weeks.
Step 2: Golden Yellow, the first dye bath.
The first dye bath should never boil or otherwise be too hot, to prevent the skin from curling. A curled skin would give an uneven dye result.
In the next photo you can see that the feather patch is floating and the natural water resistance prevents the dye from protruding deeply at this point, just like when the bird sits in the water of a pond. You can imagine the effect if the skin would be curled.
Timing in the first dye bath is very important. The dye stock should be strong to keep the feathers from sitting in the stock for hours and sometimes days. A weak dye bath will require more time in the dye stock to obtain the desired colour, thus the longer the feather patch sits in the dye bath the more chance of the dye soaking up into the patch.
Lift the patch from time to time, to check it’s status. When the it looks dark enough, take it out and move on to step 3.
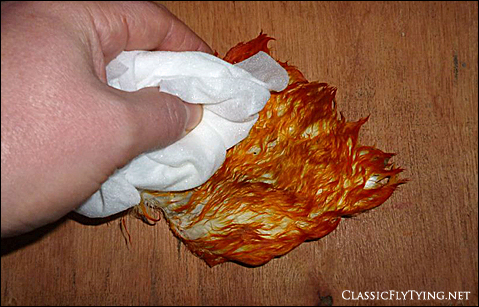
Step 3: Preparations for the second dye bath.
Rubbing with a cleaning cloth will degrease the tips and allow the feathers to soak deeper into the second dye bath.
Step 4: Bright Yellow: the second dye bath.
This step will colour the middle part of the feathers, giving them the two-colour effect. You can clearly see that the patch is completely submerged, while in the first dye bath, the patch was still floating on the surface. The natural water resistance prevents the dye from protruding all the way, so the base of the feathers remains white, just like with natural Toucan.
Lift the patch from time to time. When you are satisfied with colouration of the parts that were still white after dye bath one, take the patch out and move on to the next step.
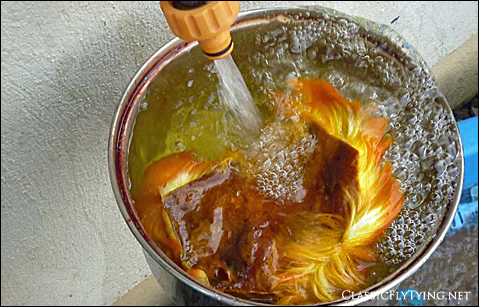
Step 5: Rinsing the patch.
Now that the feathers are completely saturated, water will easily protrude and wash out the dye. Rinse properly and throroughly, until all chemicals have been washed out.
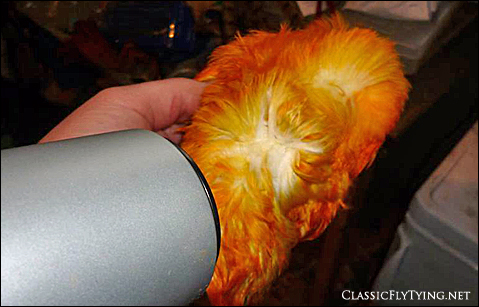
Step 8: Dryng with a blow dryer for the best result.
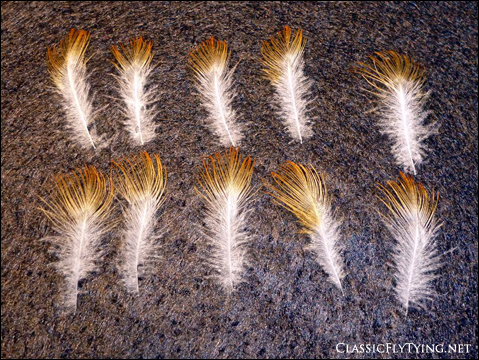
The final result
With a deeper orange colour, this could also be a realistic Flame Bowerbird substitute.

The next photo shows the individual feathers. It is quite amazing how little the dye has actually managed to protrude, allowing for a very realistic Toucan substitute.
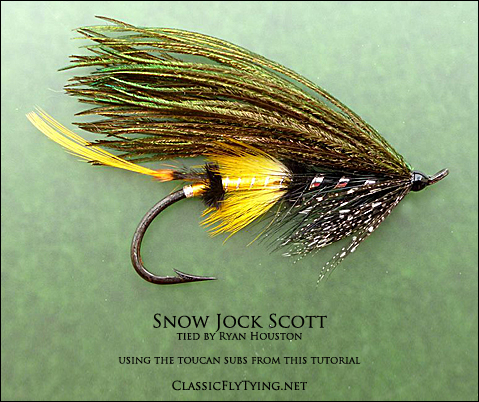
Here is an example of a fly that uses the Toucan subs that were made for this tutorial.
About the author
Ryan Houston is a Veterinary surgeon, working in Co. Fermanagh in Northern Ireland. In 2006 he started dabbling with classic fly ting. Ryan won several competitions in 2009 and 2010, and passionately runs a successful “tie on demand” fly tying business, where flies are guaranteed to be tied with a pedigree behind them that simply is not available commercially.
Ryan offers to take a pattern and interpret it in whatever way the client wants. This input is not available in commercial enterprises in general and makes Ryan’s service unique.
For more information: http://www.ryansflies.co.uk